Laser Cutting Guide

A ccloseup look of laser cutting a metal.

Your Guide to Cutting, Engraving, and Bringing Ideas to Life

You’ve probably seen them, incredibly intricate wooden maps, custom acrylic signs with a company’s logo, or precisely fitted gears that look like they were made by a machine from the future. And the truth is, they were. But here’s the secret: that machine, a laser cutter, is far more accessible and understandable than you might think.

It feels a bit like having a light saber tied to a robot arm, one that you can control with your computer. It’s a tool of immense power and stunning precision, and it’s changing how makers, designers, and small businesses create everything.

If you’ve been curious about how it all works, you’ve come to the right place. Consider this your friendly, no-jargon guide. We’re going to walk through the entire process, from a blank screen to a finished, physical object you can hold in your hands.

What is Laser Cutting?

Let’s strip away the mystery. At its simplest, a laser cutter is a computerized tool that uses a highly focused beam of light to cut or engrave materials.

Think about using a magnifying glass to focus sunlight onto a leaf and burn a tiny spot. A laser cutter is the high-tech, incredibly precise version of that. It can guide that concentrated point of heat with unbelievable accuracy, following a digital design to slice through material or mark its surface.

It’s a form of digital fabrication, and it’s brilliant for a few key reasons:

  • Precision on Another Level: We’re talking about tolerances finer than a human hair. This allows for incredibly complex and delicate designs that would be impossible or prohibitively expensive to make by hand.
  • No Touch, No Tears: Because the laser beam never physically touches the material, there’s no tooling wear and tear, and no chance of a “slip of the hand” ruining a piece. It also means fragile materials can be cut without cracking or breaking from pressure.
  • Speed from Idea to Object: You can go from a digital design on your screen to a finished, physical part in minutes. This speed is a game-changer for prototyping and small-batch production.
  • Versatility is its Middle Name: With the right settings, the same machine can cut through a quarter-inch of wood, engrave a detailed photograph onto glass, or just lightly mark the surface of leather.

How Does it Actually Happens

The process feels almost like magic, but it’s a very logical series of steps. Understanding this flow is the key to unlocking the laser cutter’s potential.

Lasercut vector files.

Stage 1: It All Starts with Vector Files

This is the most important concept to grasp. Laser cutters don’t understand JPEGs or PNGs the way we do. They need vector files.

  • Raster vs. Vector: Think of a raster image (like a photo) as being made of pixels. If you zoom in, it gets blurry. A vector image, on the other hand, is made of mathematical paths and points. You can zoom in a million percent, and the lines remain perfectly sharp and crisp. The laser cutter follows these paths.
  • The Power of Paths: In your design software, you assign different types of paths to tell the laser what to do.
    – A red line might mean “Cut all the way through along this path.”
    – A blue line might mean “Just engrave this line onto the surface.”
    – A black fill might mean “Engrave this entire area.”

The most common and universal vector file format for laser cutting is the .DXF (Drawing Exchange Format) or .SVG (Scalable Vector Graphics). Software like Adobe Illustrator, CorelDRAW, or the free, browser-based Inkscape are your go-to tools for creating these files.

Control software for laser cutting.

Stage 2: Preparing the Job in Control Software

Once your design is ready, you need to send it to the laser cutter. This is done through a control software like LightBurn or the proprietary software that comes with specific brands like GlowForge or Universal.

This software is your mission control. Here, you:

  • Import Your Vector File: You bring your design in.
  • Set Your Material: You tell the software what you’re working with (e.g., “3mm Birch Plywood”).
  • Assign Power and Speed: This is the heart of the process. You define how powerful the laser should be and how fast it should move for each type of path (cut, engrave, etc.). Too much power on acrylic and you might melt it unevenly; not enough power on wood and you won’t cut through. This is where experience and material settings charts come in.
  • Focus the Laser: The lens must be at the perfect distance from the material for the beam to be at its finest point. This is often a manual step or an automated one on higher-end machines.
  • Hit “Start”: The software translates your design and settings into commands and sends them to the laser cutter.

Stage 3: Cutting and Engraving

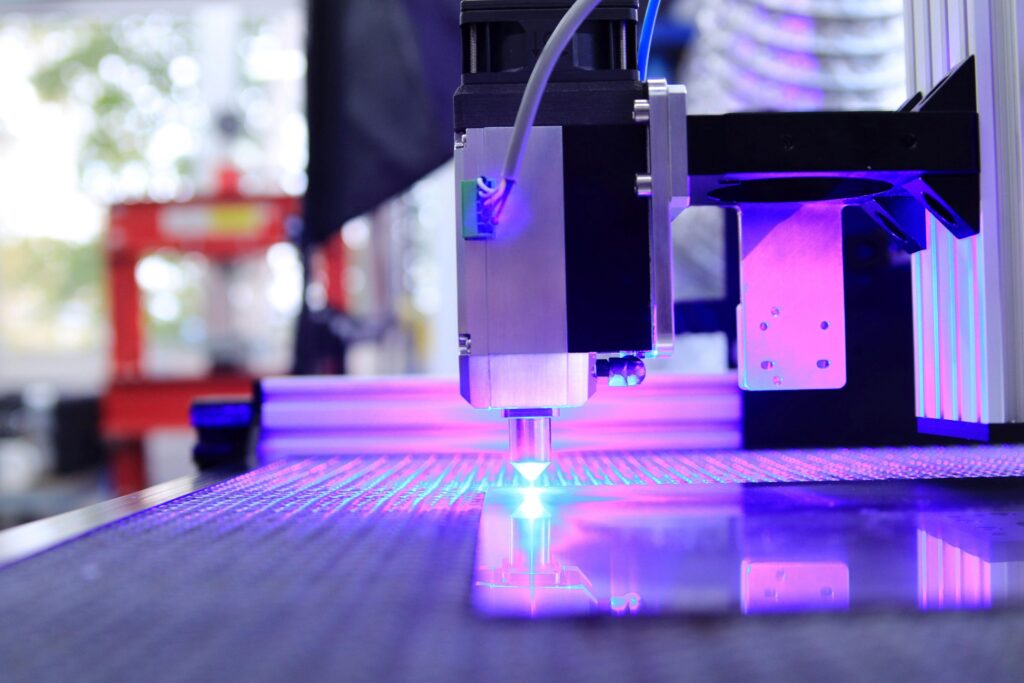
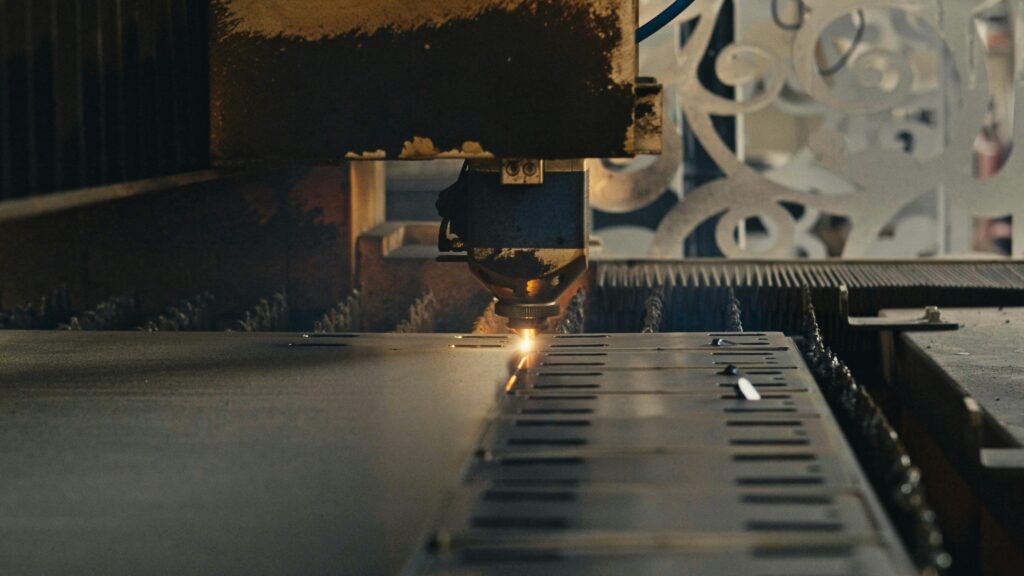
You press go, and the show begins. The machine hums to life. You’ll see a bright flash of light (from the laser tube) and then, almost immediately, you might see smoke or flame as the laser hits the material. Don’t be alarmed, this is normal! That’s why the machine has a powerful exhaust fan and an air assist (a stream of compressed air that blows into the cut, keeping the lens clean and helping the material burn cleaner).

The laser head glides smoothly along its rails, tracing your design with pinpoint accuracy. It’s mesmerizing to watch. For an engraving, it will methodically scan back and forth, like a printer, but with light and fire.

Post process of a laser cut material.

Stage 4: Post-Processing

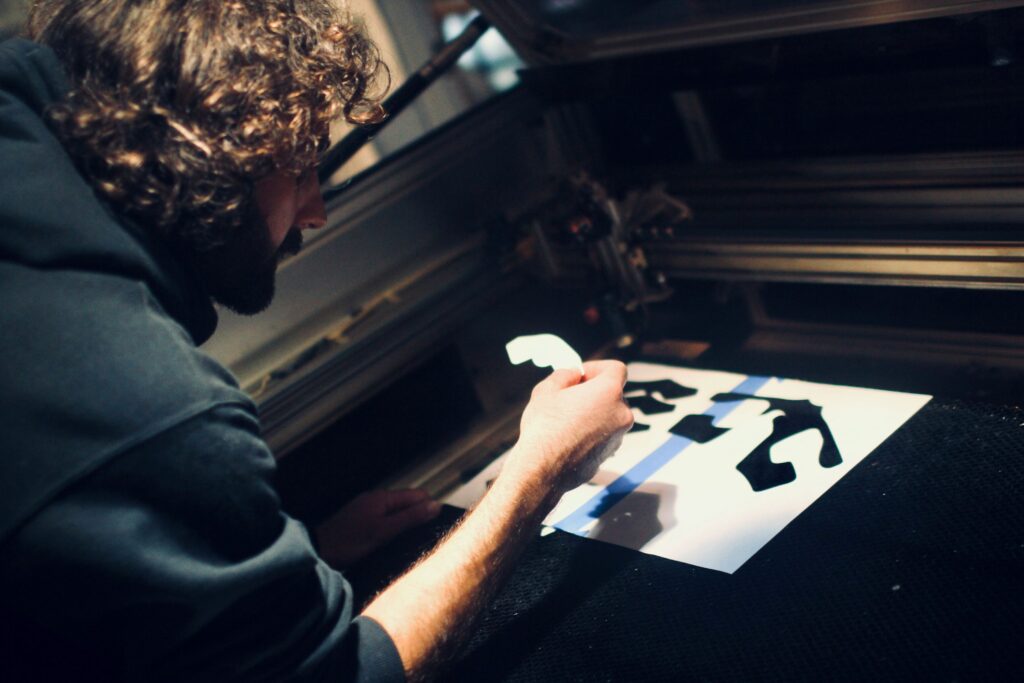
When the machine finishes and the exhaust clears the smoke, you open the lid. There’s a certain thrill to this moment every single time. Your finished parts are often sitting on the “waste” material. You might need to:

  • Remove the Parts: Gently lift your cut pieces from the surrounding material.
  • Clean Up: Engraved and cut pieces can have residue, called “laser char,” around the edges. A little sanding or wiping with a specialized cleaner can make them pop.
  • Assemble: One of the joys of laser cutting is creating parts that fit together with living hinges, finger joints, or snap-fit connections. The precision of the laser makes complex assemblies not just possible, but easy.

A World of Materials: What Can You Actually Use?

This is the fun part. A CO2 laser (the most common type for workshops and small businesses) can work with a stunning variety of materials.

  • Wood & Paper: This is a classic. Plywood, MDF, balsa wood, and cardstock engrave and cut beautifully, giving a lovely, toasted brown engraving.
  • Acrylic: Laser cutting acrylic gives you a perfectly polished, crystal-clear edge. It’s the material of choice for professional-looking signs and models. You can cut it and engrave it with stunning results.
  • Leather & Fabric: You can engrave intricate patterns onto leather for wallets or belts, and cut precise shapes from fabric.
  • Anodized Aluminum: You can’t cut metal with a standard CO2 laser, but you can engrave it. The laser vaporizes the colored anodized layer, revealing the shiny silver metal underneath, creating a permanent, high-contrast mark.
  • Glass & Stone: You can engrave photographs and text onto these surfaces, giving them a frosted, permanent appearance.

A Critical Safety Note

There are also materials you must NEVER put in a laser cutter. PVC, Vinyl, and Polycarbonate release toxic chlorine gas when cut, which is extremely dangerous to breathe and corrosive to your machine. ABS tends to melt and catch fire. Always, always check the material’s safety data sheet before cutting.

The Bigger Picture: Why This Matters

Laser cutting has moved far beyond a niche hobby. It’s a cornerstone of the modern “maker” movement and a powerful professional tool.

  • Small Batch Manufacturing: Etsy shops and small businesses use laser cutters to produce everything from custom wedding invitations to architectural models and unique home decor.
  • Rapid Prototyping: Product designers can cut and assemble a full-scale prototype of a product enclosure in an afternoon, iterating designs at an incredible pace.
  • Personalization: The ability to create one-of-a-kind, customized items on demand is perhaps its most powerful social application, from personalized gifts to adaptive aids for people with disabilities.

The barrier to entry has never been lower. The software is more intuitive, and access to machines is more widespread than ever.

So, what will you create? A set of perfectly fitting boxes? An intricate lampshade? A custom nameplate for your desk? The laser is a tool that turns precise digital designs into tangible reality. It’s a bridge between the pixels on your screen and the physical world.

And that bridge is now open for you to cross. Find a design, find a machine, and take that first cut. You might just amaze yourself with what you can bring to life.